How Was a Medieval Shield Actually Painted? From Ground to Finished Heraldry
From wooden core to finished heraldry: how surviving medieval shields were actually decorated, tracing facing, ground, relief, metallic leaf and paint across twenty-four surviving objects — and why "painted shield" understates the craft.
A medieval shield painter did not simply take a finished wooden shield, dip a brush into paint and begin painting a coat of arms.
The surviving shields tell us something considerably more interesting.
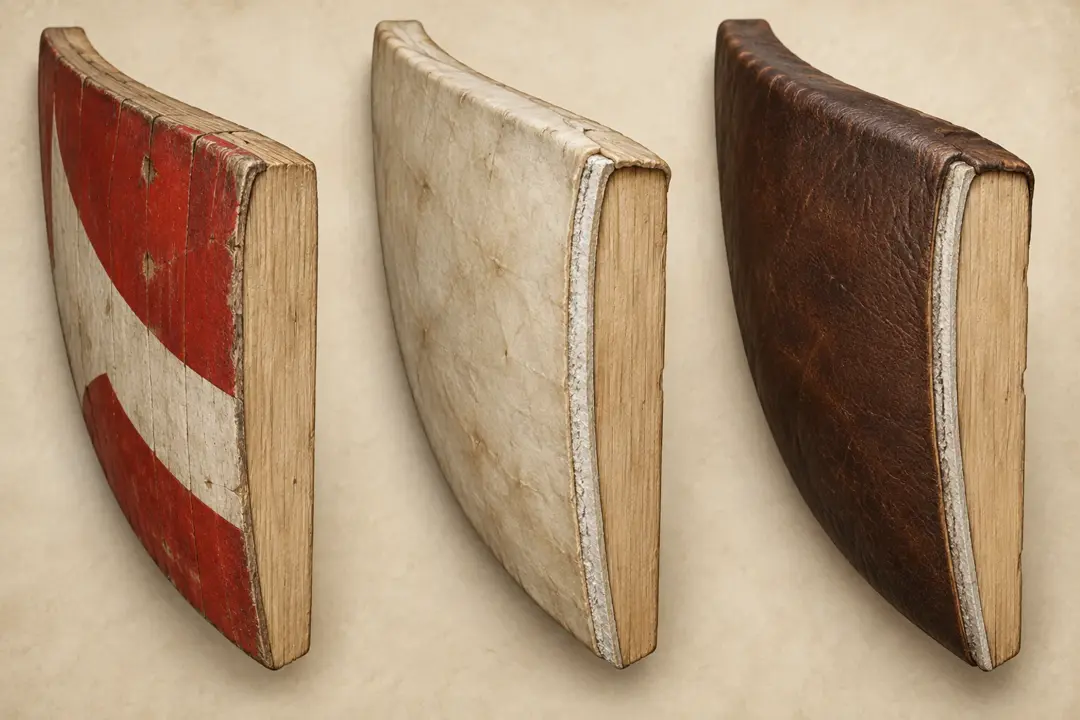
On many medieval shields, the visible decoration was the final stage of a carefully constructed surface. Wood might first be covered with parchment, leather or textile. That surface could then receive several preparatory layers. These could be smoothed, modelled, impressed or otherwise worked before colour was applied. Heraldic figures might be painted, but they could also be raised above the surrounding field, covered with silver or gold leaf, glazed with colour, outlined, or constructed partly from additional materials.
The result was not simply a painted wooden shield.
It could be a complex composite object built from wood, glue, animal skin or textile, mineral grounds, pigments, metal leaf and sometimes three-dimensional decoration.
Our study of twenty-four surviving medieval shields suggests that there was no single medieval recipe. Nevertheless, enough physical evidence survives to reconstruct some of the methods used by medieval shield makers and painters.
This article concentrates specifically on how those decorated surfaces were produced. For the pigments and colours themselves, see our separate study, How Were Medieval Shields Painted? Paints, Pigments and the Medieval Shield Surface.
The Short Answer
A plausible sequence for a highly finished medieval shield was: wooden core, facing or covering, preparatory ground, smoothing or modelling, layout of the design, background colour, heraldic decoration, metallic leaf and/or painted details, outlining and finishing.
But this must not be treated as a universal medieval formula.
Some shields preserve much simpler surfaces. Others have extraordinarily sophisticated decoration. Some stages remain uncertain because the outer layers have been lost or altered by centuries of use, burial, conservation and restoration.
The surviving evidence shows a family of techniques rather than one standard process.
And that distinction matters.
Before Painting: Building a Surface
The painter's working surface began with the shield maker.
A plank-built wooden core was not necessarily an ideal surface for fine painting. Grain, plank joints, glue lines and irregularities could remain visible. Wood also responds to changes in moisture.
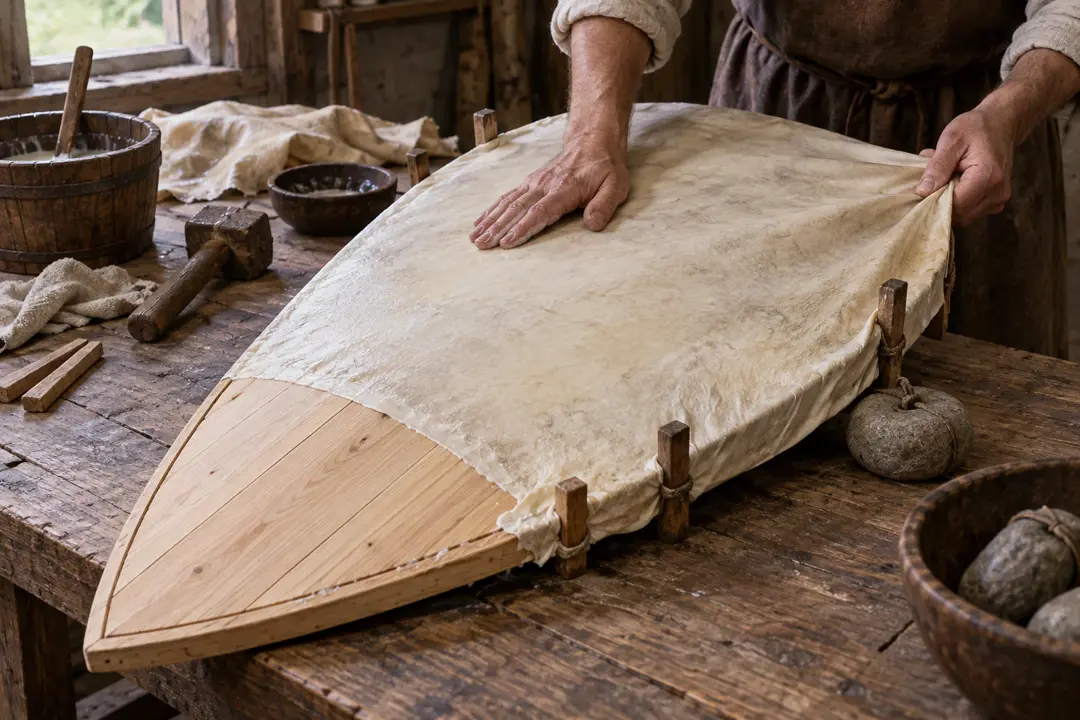
One solution was to separate the painted surface from the timber by adding another material.
Among surviving medieval shields we encounter parchment, leather and textile associated with the wooden core. Over these materials could be placed mineral preparation layers generally described in the literature using terms such as chalk ground, gypsum ground, gesso, stucco or Kreidegrund. These terms should not automatically be treated as interchangeable.
The heraldic painting was often applied to a deliberately prepared surface rather than directly onto bare planks.
The development of this system can be followed through the surviving shields.
Late Twelfth Century: The Painted Shield from Szczecin
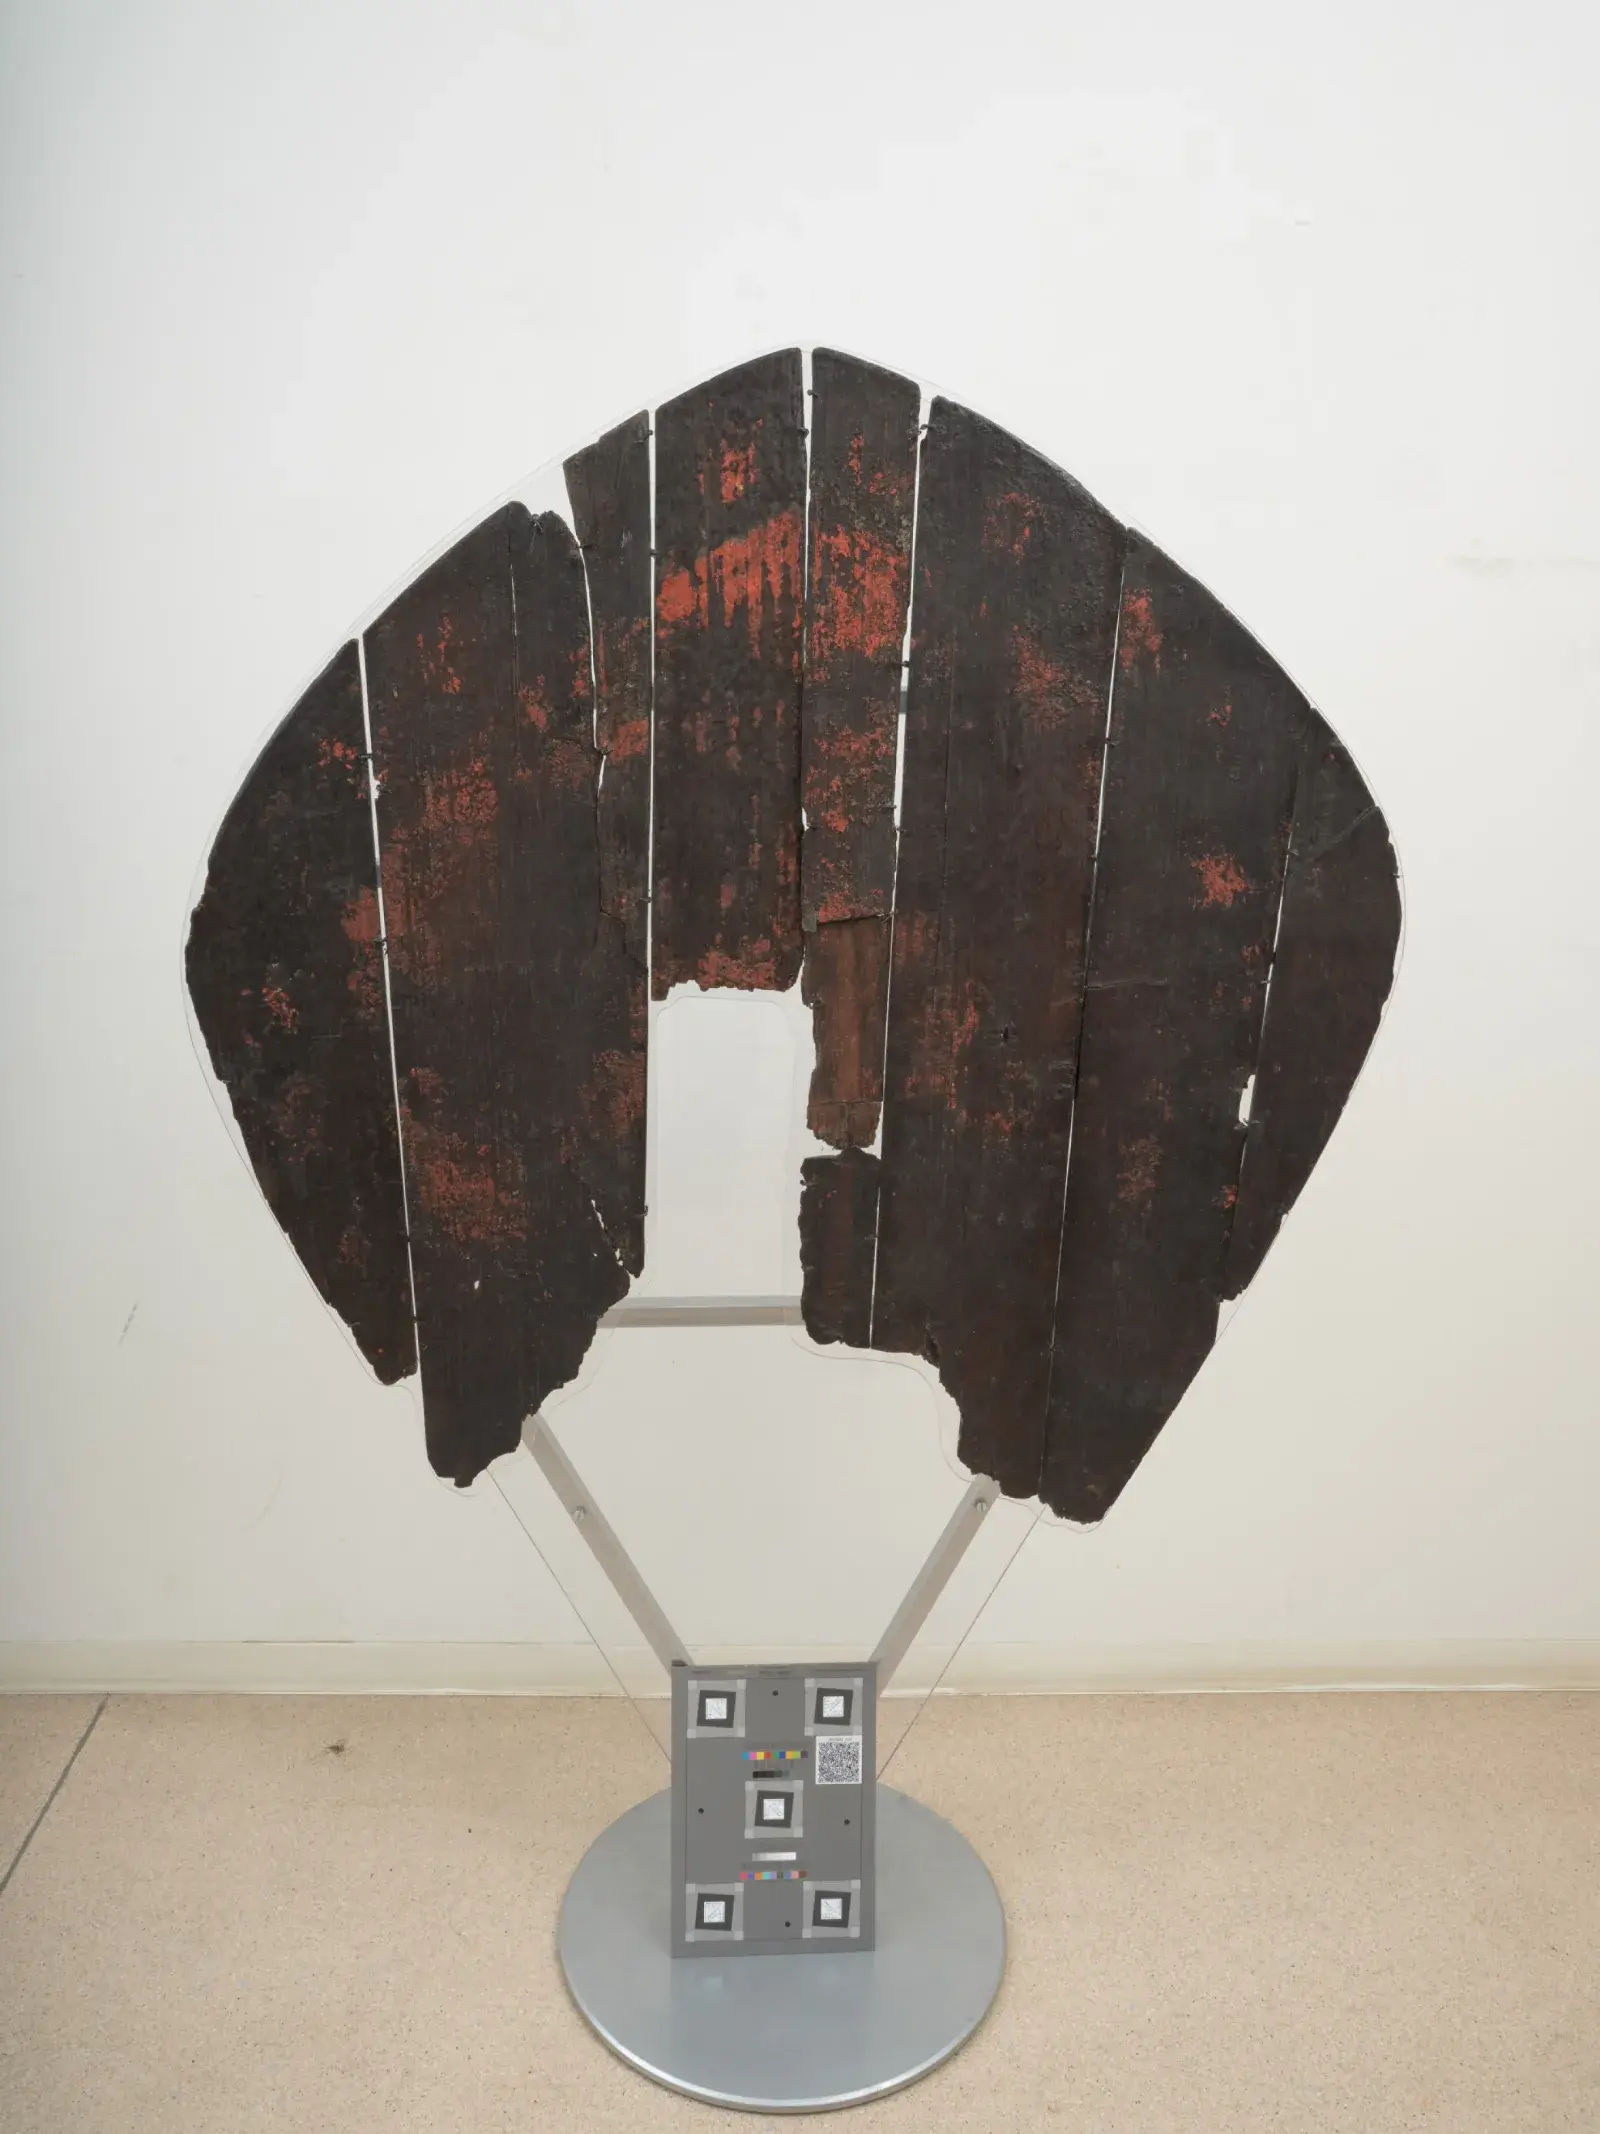
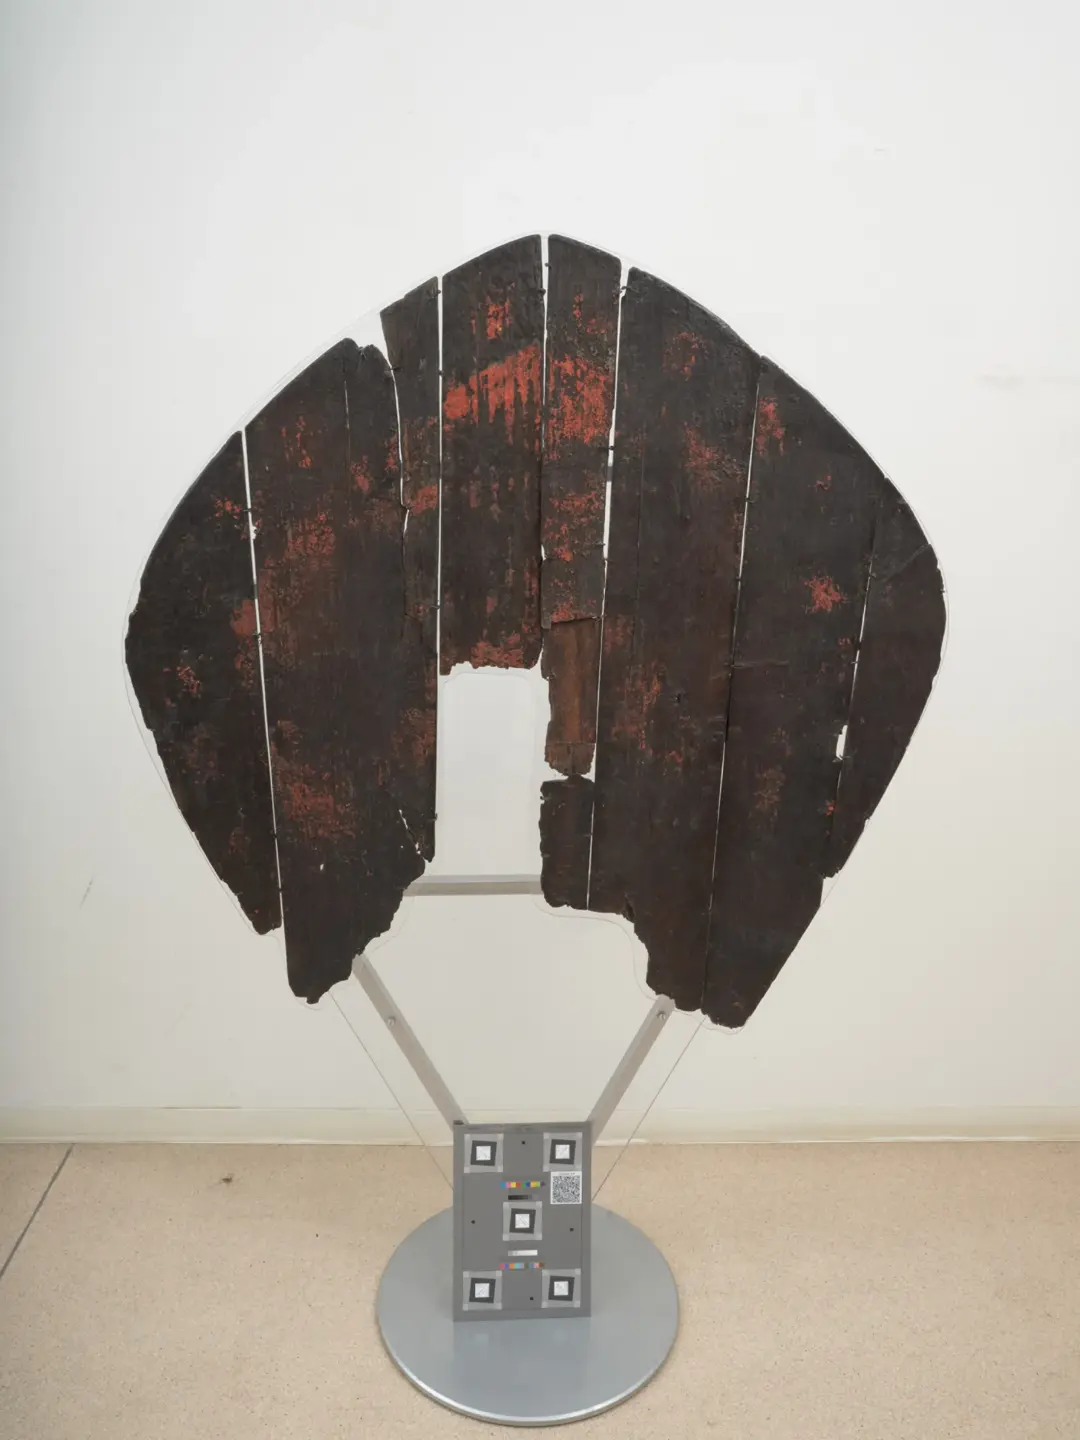
The painted kite shield discovered at Szczecin and dated approximately 1176–1200 is one of the earliest objects in our corpus preserving substantial painted decoration.
Its importance lies partly in its simplicity, but also in the questions it raises. The surviving shield is constructed from alder planks and retains red, yellow and dark decoration. Conservation literature has discussed a more complicated surface stratigraphy involving an organic layer, a pale preparation layer and pigments.
Exactly how every surviving layer should be interpreted remains debated. That makes Szczecin extremely important methodologically.
Szczecin therefore represents the beginning of our chronological evidence trail, but not yet a complete workshop manual.
Around 1200: The Seedorf Shield Changes the Picture
The shield traditionally associated with Arnold von Brienz at Seedorf, dating around 1200–1220, provides much more revealing technical evidence.
Here the painter was no longer simply working on an uncertainly prepared wooden surface. The surviving construction shows a deliberately engineered painting system.
The wooden core was faced with parchment. Onto this were applied preparatory layers including gypsum-based ground. Technical study describes an additional priming layer containing white lead and an organic black component.
Then came the blue. Instead of treating "blue" as a single coat, analysis indicates different grades of azurite. A finer azurite layer produced a lighter blue, followed by coarser azurite producing a deeper and more intense surface colour.
The painter was manipulating not only which pigment was used, but how that pigment was prepared and layered.
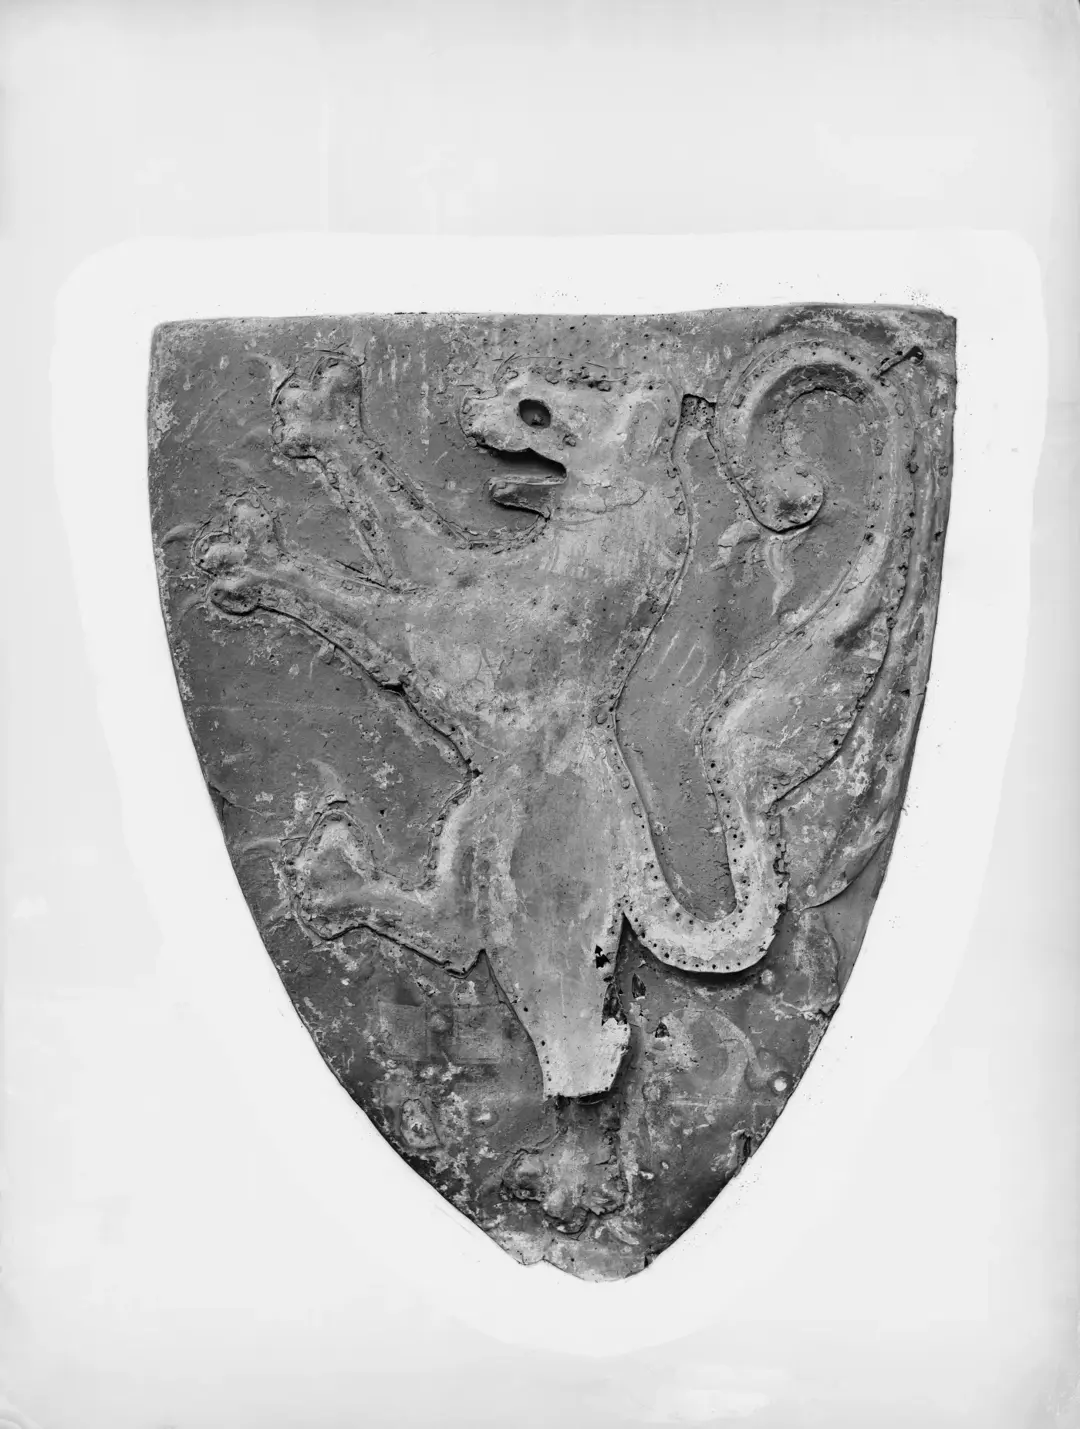
The heraldic lion was treated differently again. It was modelled in gesso and covered with silver leaf.
The Seedorf shield therefore preserves evidence for several distinct workshop operations:
- preparation of the wooden core
- application of parchment
- application of mineral ground
- application of a preparatory or priming layer
- construction of the coloured field in successive paint layers
- modelling of heraldic decoration
- application of metallic leaf
This was not crude battlefield painting. It was sophisticated decorative craftsmanship.
Painting Was Sometimes Sculpture
Seedorf also introduces one of the most important lessons from the surviving shields. Medieval heraldry did not always remain flat.
A heraldic charge could literally rise above the field of the shield. Ground material could be built up or modelled into relief. Other shields demonstrate related techniques in which decoration was impressed, moulded or otherwise given physical depth.
This transforms how we should imagine a newly made medieval shield. Seen from several metres away, the heraldry provided identification. Seen close up, some shields would have revealed another level of workmanship entirely: texture, raised ornament, metallic surfaces and carefully differentiated materials.
Painting and sculpture could therefore become part of the same decorative process.
c. 1230–1240: The Shield of Konrad von Thüringen
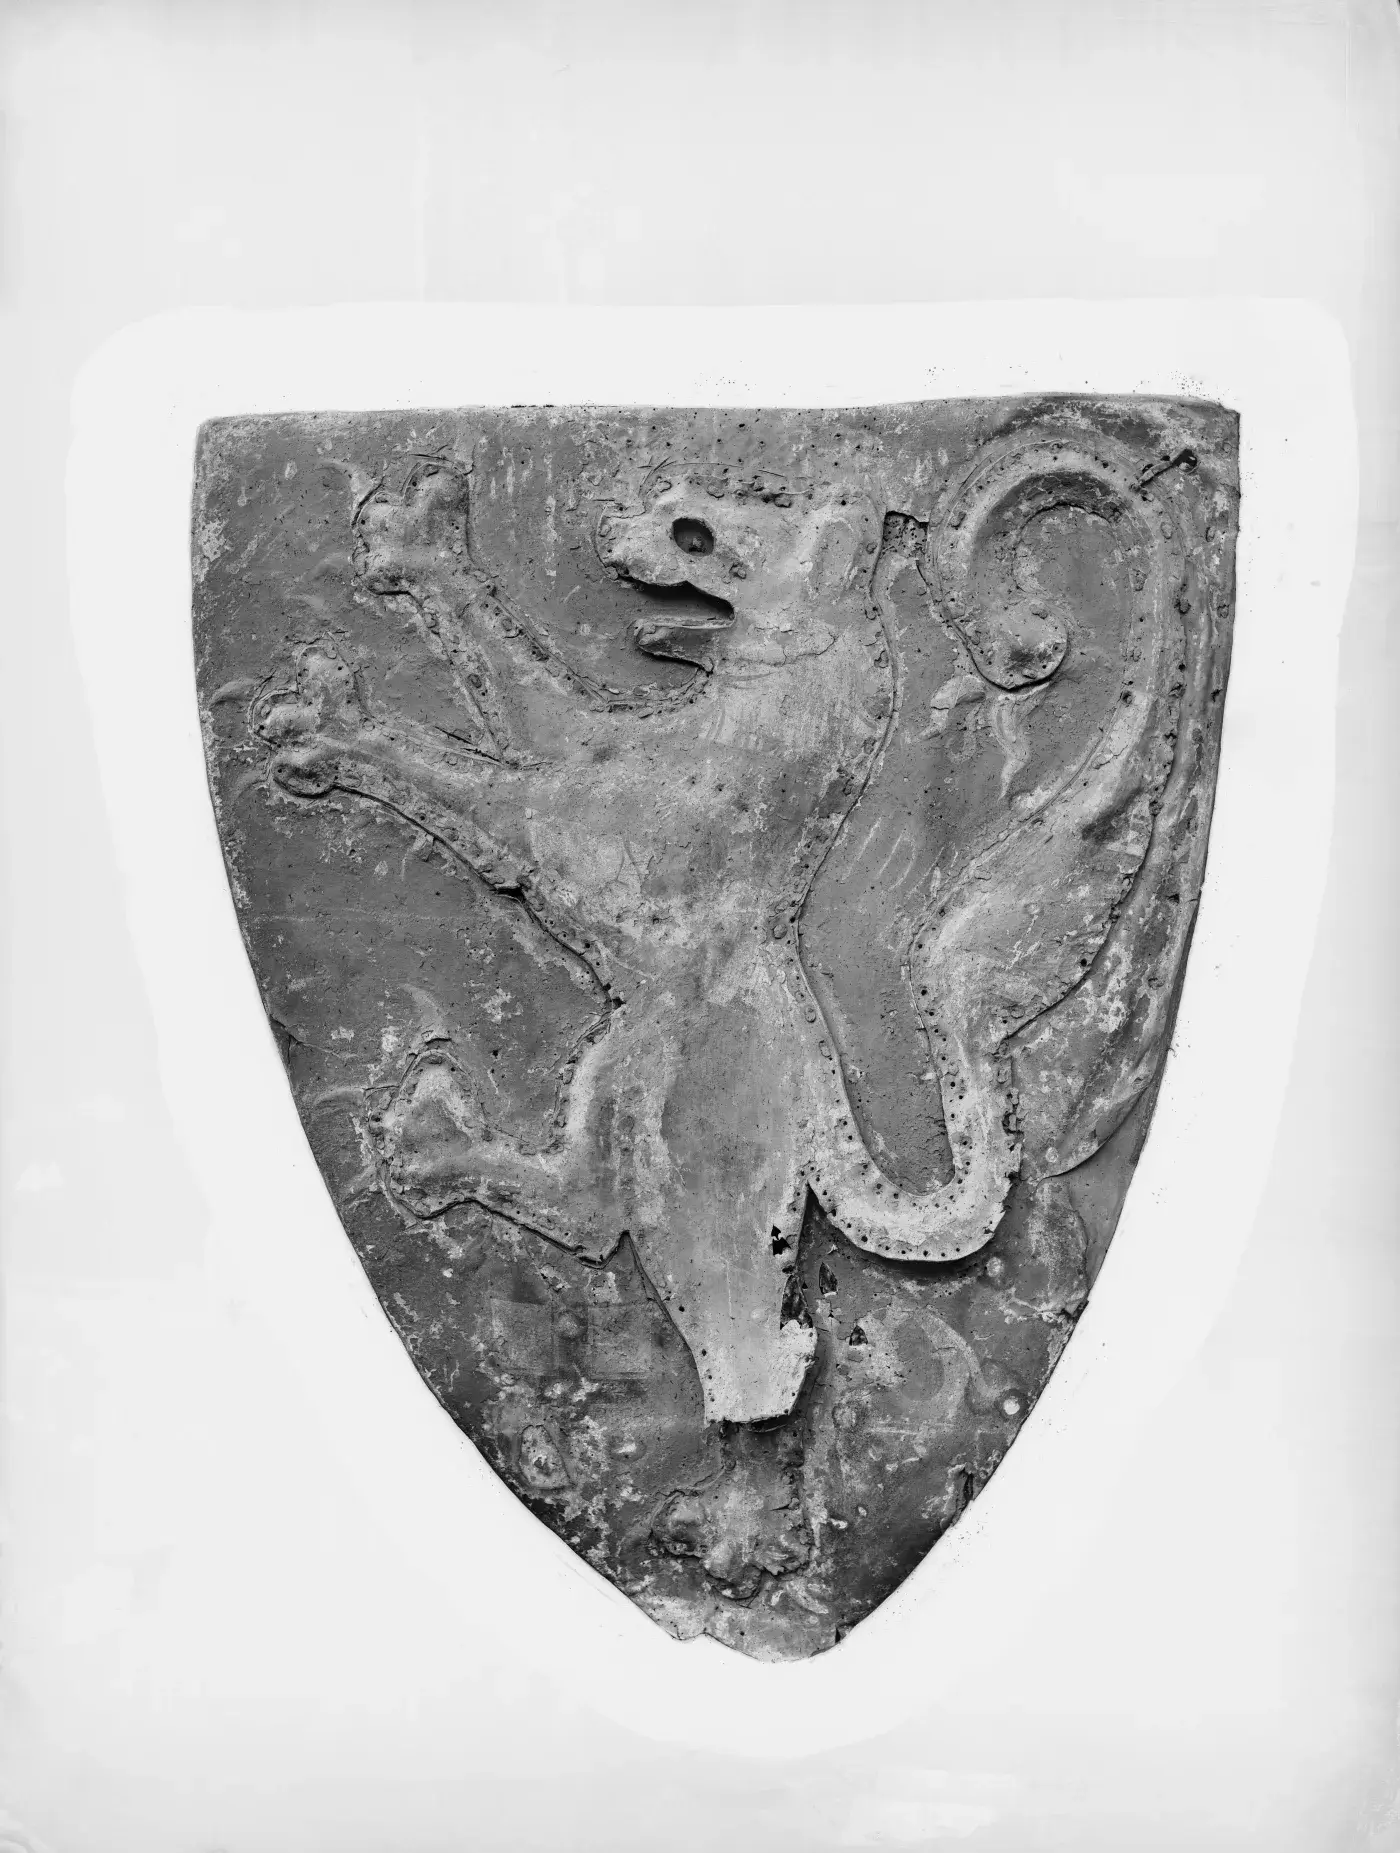
The famous shield associated with Landgrave Konrad von Thüringen, preserved at Marburg and dated approximately 1230–1240, takes this principle further.
Its institutional material record identifies linden wood, leather, chalk ground and polychrome decoration.
The famous heraldic lion was not merely represented by coloured lines on a flat surface. Historical descriptions identify a raised lion incorporating pressed leather, while painted details supplied elements such as the claws. Traces associated with fastening parts of the decoration also survive.
Whatever uncertainties remain concerning the exact original sequence of every layer, the broader technical principle is unmistakable. The medieval shield decorator could combine woodworking, covering, ground preparation, relief work, painting and applied materials. The shield was effectively a three-dimensional heraldic panel.
This also reminds us that the person responsible for decorating a prestigious shield was not necessarily simply a "painter" in the modern sense. Later documentary traditions refer to specialist shield painters or shield workers, including the German Schilter, whose work extended into other heraldically decorated equipment.
The Thirteenth Century: From Image to Surface
Other surviving thirteenth-century shields in our corpus reinforce the importance of prepared grounds.
The shields associated with Keseberg, Liederbach, Nordeck, Welfenberg/Helfenberg, Arnsberg and other surviving examples do not all preserve equally complete paint sequences.
That uneven preservation is itself important. A surviving shield may tell us a great deal about its wooden core but little about its original paint. Another may preserve covering material while its outermost decoration has largely disappeared.
Instead, the surviving thirteenth-century evidence increasingly demonstrates that the preparation of the surface was itself part of the decorative craft. The painter needed a surface suitable for the intended finish.
A simple painted device required one thing. A smooth, brilliant heraldic field required another. Silvering or gilding demanded still more careful preparation. Raised ornament required yet another process.
The Oña Shields: Painting, Ground and Gilding
The medieval shields associated with Oña in Spain provide another particularly important group.
One of the surviving examples, usually identified as D59, preserves a complex layered surface involving parchment, multiple gypsum or stucco-like preparation layers, paint and gilding.
This is exactly the kind of object that makes the modern phrase "painted shield" inadequate. Before the final heraldry could be seen, the craftsman had constructed a suitable surface beneath it. For areas intended to receive metal leaf, the preparation had to provide an appropriate base.
Gold was therefore not simply "gold paint." Where gilding survives, we are dealing with an entirely different optical material.
Light reflects from metal leaf differently from any ordinary yellow pigment. The same principle applies to silver. A newly made shield incorporating polished or bright metal leaf would consequently have behaved very differently in sunlight from the dull surfaces we now see in museums.
Silver Was Not Necessarily Meant to Stay Silver
The use of silver leaf introduces another important painting technique. Metal leaf could serve as the visible finished surface. But it could also become the reflective foundation beneath another colour.
A translucent coloured layer placed over a metallic surface produces a visual effect that ordinary opaque paint cannot reproduce. Light passes through the coloured layer, reflects from the metal beneath it and returns through the colour. The result can appear luminous.
This means that identifying a coloured medieval surface does not necessarily tell us everything about how that colour was created. The colour could be produced by pigment alone. Or pigment could form part of a multilayer optical system.
This distinction becomes increasingly important when examining later medieval shields.
c. 1300: Decoration Becomes Architectural
Around the turn of the fourteenth century, shields such as those associated with Stromberg, Steinau-Steinrück and related surviving examples reveal increasingly elaborate treatment of the ground itself.
At Stromberg, the documented sequence includes covering, chalk preparation, raised or modelled decoration, silvering and painting.
The ground had ceased to be merely something hidden underneath the picture. It became part of the picture.
This is a crucial development. A modern painter normally thinks of primer as something that disappears beneath the final image. The medieval shield decorator could use the preparatory material itself to create ornament. Patterns could be impressed into it. Lines could be raised. Heraldic elements could be modelled. Fields could acquire repeating textures.
Once painted or covered with metallic leaf, these structures interacted with light. The shield's heraldry therefore worked through colour, relief and reflection simultaneously.
The Steinau Shield and Patterned Grounds
The shield associated with Steinau-Steinrück provides particularly useful evidence for the manipulation of the ground. Its decoration demonstrates that the preparatory surface could be patterned rather than simply smoothed.
Repeated impressions could create what is often described as diapering or Damaszierung: a patterned surface occupying areas of the heraldic field.
The important point is not simply the name of the technique. It is the sequence. The craftsman had to decide upon the decoration before the final colour surface existed. The pattern belonged physically to the ground. Paint and metallic decoration subsequently made that underlying texture visible.
This is very different from painting a decorative pattern onto an already finished shield. The decoration was built into the surface.
Drawing the Heraldry
One frustrating question remains surprisingly difficult to answer from many surviving shields: how was the design transferred onto the shield?
A medieval painter needed some means of positioning heraldic charges accurately across a curved surface. A simple geometric division could be established using measured reference points and straight or curved guidelines. More complex animals, eagles, lions and other charges required greater planning.
Freehand drawing, measured construction and workshop patterns are all plausible in appropriate contexts, but plausibility is not the same as direct evidence from a particular shield.
What the surviving objects demonstrate more securely is that painters were capable of laying out complex heraldic compositions with considerable precision.
Background First, Heraldry Second?
It is tempting to imagine a universal sequence: paint the field first, then paint the heraldic charge over it.
Sometimes that may indeed have been the practical approach. But again, the surviving shields warn us against turning a sensible workshop method into a universal historical rule.
Where relief decoration was involved, the principal heraldic design might already physically exist before the final colour was applied. Where silver or gold leaf was involved, different areas required different preparation. Where patterned ground was used, decorative planning began before either field or charge received its final appearance.
The order of work therefore depended upon the intended finished surface. The medieval craftsman was constructing the decoration, not simply colouring it in.
c. 1320: The Shield of Karl von Trier
The shield associated with Karl von Trier, Grand Master of the Teutonic Order, belongs to another important stage in this development. Its surviving preparation again demonstrates the use of mineral ground beneath heraldic decoration.
By this period, the evidence accumulated across the surviving corpus makes one point increasingly difficult to ignore: the carefully prepared heraldic surface was not an isolated experiment.
Across a number of surviving elite shields, the wooden core functioned as a structural foundation over which a separate decorative surface was constructed.
This does not mean every fighting shield in Europe was manufactured this way. Survival strongly favours prestigious objects, funerary shields, display objects and shields preserved in churches and collections. Our sample is therefore biased.
But for the elite shields that do survive, sophisticated surface preparation appears repeatedly.
Fourteenth-Century Shields: Increasing Visual Complexity
The fourteenth-century shields in our corpus, including examples associated with Muschenheim, Bartolomei, the Sion group and other surviving objects, continue to demonstrate the diversity of medieval shield decoration.
Some preserve more evidence than others. Together they show why reconstruction based upon a single famous shield is dangerous. There was no single "fourteenth-century shield paint job."
Different objects combine different materials and techniques. Some emphasize painted heraldry. Some employ substantial preparation layers. Some incorporate relief. Some use metallic surfaces. Some preserve only fragments from which the original appearance must be reconstructed cautiously.
By this stage, however, the shield painter possessed a remarkably broad technical vocabulary.
Painting a Curved Object
There is another practical issue that is easy to overlook. These painters were not decorating flat panels. Many medieval shields are curved. That changes the work.
A heraldic animal drawn perfectly on paper cannot simply be enlarged geometrically onto a strongly curved shield without considering how the design will appear from the front. Large charges must remain visually coherent while wrapping around the curvature. Edges also complicate the composition.
The craftsman therefore had to work with the shield as a three-dimensional object.
The finished heraldry was designed to be read on the shield, not as an independent flat illustration.
Outlining and Fine Detail
The final stages of painting could include outlining and smaller painted details. Dark outlines help separate adjacent colours and clarify complicated heraldic forms. Small details could also be added with a brush after larger structural elements had been completed.
The Konrad shield provides an especially evocative example because historical descriptions distinguish between its constructed lion and painted details such as its yellow claws. The heraldic image was therefore assembled using whichever technique best suited each component.
A lion might simultaneously consist of:
- relief
- applied material
- colour
- outline
- metallic decoration
- separately rendered details
Calling that simply "painting" understates the craft involved.
c. 1376: The Black Prince's Shield
The shield associated with Edward of Woodstock, the Black Prince, who died in 1376, presents another complicated surface system. Its surviving construction includes textile, gesso-like preparation, a paper-like intermediate layer and leather within the composite surface.
Whatever changes, repairs and conservation history must be considered when interpreting individual layers, the object demonstrates just how far removed some prestigious medieval shields were from the idea of paint directly applied to timber.
By the later fourteenth century, a shield could contain numerous specialised layers between its wooden structure and its visible heraldic surface. Each had a job.
The wood provided structure. The covering helped create or reinforce the surface. The ground provided the painting foundation. Intermediate materials could modify that surface further. Only then did the visible heraldry complete the object.
Around 1400 and the Early Fifteenth Century
The later shields in our twenty-four-object corpus, including the later Oña and Sion examples and early fifteenth-century pavoise material, demonstrate the continuation and further elaboration of decorated shield surfaces.
By this period we encounter objects whose decoration belongs increasingly to the same technical world as medieval panel painting and polychrome decorative art. Ground preparation, painting, gilding, silvering, modelling and patterned surfaces could all contribute to shield decoration.
The boundary between armour, heraldry and decorative art becomes increasingly artificial when looking at the objects themselves.
A prestigious shield could be all three.
Was Egg Tempera Used?
This requires caution.
Egg-based tempera is entirely at home within medieval painting technology, and modern historically informed reconstructions frequently use it. But we should not turn that general medieval practice into an object-specific statement without analytical evidence.
Identifying a mineral pigment tells us what supplied the colour. It does not automatically identify the binder. The same pigment can be used with different binding media.
This distinction may appear pedantic. It is fundamental to responsible reconstruction.
Were Shields Varnished?
The same caution applies to final protective coatings. It is tempting to imagine that a finished shield must have received a universal varnish to protect its painting.
The twenty-four shields do not justify such a universal statement. Organic surface coatings are particularly difficult to interpret after centuries of ageing, cleaning, restoration and conservation.
Some historical surfaces may indeed have received coatings or glazes. But we should not automatically add "varnish" as the final step in every reconstructed medieval shield.
So How Long Did Painting a Shield Take?
The surviving objects cannot give us a reliable universal number of days. But their construction tells us something important.
A highly decorated shield could not necessarily be finished in a single uninterrupted painting session. Preparatory layers had to be applied. Layers needed to stabilise or dry sufficiently for subsequent work. Ground might need smoothing. Relief decoration needed construction. Metal leaf required its own preparation. Paint might consist of multiple applications. Details and outlines followed.
The finished shield was therefore the product of a sequence of operations, not one coat of colour.
Prestigious examples may represent substantial skilled labour.
A Reconstructed Medieval Workshop Sequence
Based upon the strongest evidence across the surviving shields, we can reconstruct a possible sequence for a sophisticated medieval heraldic shield. It should be understood as a synthesis, not a universal recipe.
- Construct the wooden core — boards were selected, shaped and joined to create the structural shield.
- Shape and finish the core — the shield was brought to its intended outline and curvature.
- Apply the facing — where required, parchment, leather, textile or another covering material was attached to the core.
- Apply preparatory ground — one or more mineral preparation layers could be applied over the facing.
- Smooth the surface — where a smooth painted field was desired, the ground could be levelled to create an appropriate painting surface.
- Construct relief decoration — raised heraldic elements or patterned fields could be modelled, impressed or built up before final painting.
- Lay out the heraldic design — fields and charges had to be positioned across the curved shield.
- Prepare areas for metallic decoration — areas intended for silvering or gilding required appropriate preparation.
- Apply the major colour fields — pigmented paint established the principal heraldic colours; multiple applications could be used to create coverage, depth or particular optical effects.
- Apply gold or silver leaf — where required, metallic decoration was added.
- Apply glazes or additional colour layers — metallic surfaces could sometimes interact with translucent coloured layers rather than simply remaining exposed.
- Add outlines and details — smaller painted elements clarified the heraldic design.
- Finish the surface — any final treatment depended upon the particular shield; a universal medieval varnishing stage cannot presently be demonstrated from the corpus.
What a Newly Painted Medieval Shield May Have Looked Like
This is perhaps the greatest distortion produced by museum survival.
We normally encounter medieval shields after six, seven or eight centuries. Their pigments have altered. Organic materials have darkened. Metal leaf has tarnished or disappeared. Surfaces are cracked. Paint is missing. Ground is exposed. Edges are damaged. Conservation treatments may themselves have histories extending back centuries.
We therefore need to mentally reverse that deterioration.
Imagine the Seedorf shield when new. Its blue was not the greyed and fragmented archaeological surface we encounter today. Its azurite produced an intentionally intense blue field. Its lion carried silver leaf. Light moved across the curved shield and reflected differently from blue pigment, silver metal and raised decoration.
Imagine similar effects multiplied across shields employing gilding, patterned grounds and relief.
The medieval shield could be a remarkably bright object. Its visual function depended upon that fact.
Painted for Recognition, But Also for Display
Heraldry obviously served identification. But the surviving shields demonstrate that identification alone cannot explain the amount of decorative labour invested in some examples.
A red lion painted quickly onto a contrasting field could identify its bearer. A lion constructed in relief, carefully prepared, silvered, detailed and placed over a richly painted field goes considerably further.
Such a shield communicated status. Craftsmanship itself became part of the display. Metal leaf caught light. Relief produced shadow. Strong pigments created contrast. Patterned grounds rewarded close viewing.
The shield was simultaneously military equipment, heraldic identifier and visual statement.
What the Twenty-Four Shields Actually Tell Us
The most important conclusion from our twenty-four-shield study is not a recipe. It is variation.
The evidence does not support the claim that medieval shields were painted directly on wood. Nor does it support the claim that medieval shields were always covered in parchment, coated in gesso and painted in egg tempera. Both statements are too simple.
Instead, the surviving objects reveal a spectrum of construction and decoration. At one end are shields whose painted surface appears comparatively straightforward or whose preparation is poorly preserved. At the other are extraordinarily sophisticated composite surfaces involving coverings, multiple grounds, modelled decoration, metallic leaf and several stages of painting.
Chronology matters. Region matters. Purpose matters. Status matters. And survival matters enormously.
A Better Reconstruction Principle
For a modern reconstruction, the question therefore should not be "How were medieval shields painted?" It should be "How was this particular kind of shield, in this region and period, likely to have been painted?"
The surviving objects should determine the technique. Not a generic idea of "medieval painting."
Conclusion
The surviving medieval shields transform our understanding of what "painting a shield" actually meant.
Sometimes it may indeed have involved relatively straightforward painted decoration. But the best-preserved examples reveal something far more sophisticated.
The medieval craftsman could begin with a plank-built wooden object and progressively construct an entirely new surface over it. Parchment, leather or textile could separate the decoration from the timber. Chalk or gypsum-based preparations could create a smooth ground. Those grounds could themselves be modelled or patterned. Pigments could be applied in several layers. Heraldic charges could rise physically above the shield. Silver and gold leaf could reflect light. Metallic surfaces could interact with coloured layers. Finally, outlines and small painted details brought the heraldry together.
The resulting shield was not simply wood with a picture painted on it.
It was a layered, engineered and deliberately constructed heraldic surface.
And perhaps the most important lesson from the twenty-four surviving shields is that medieval craftsmen did not need one universal method. They selected and combined techniques according to the object they were making.
For the modern shield maker attempting historical reconstruction, that changes the question completely.
Do not begin by asking which modern paint most closely resembles a medieval colour. Begin underneath it. Ask what the painter was actually painting on. Then reconstruct the surface, layer by layer.
Only at the end should you pick up the brush.
Bibliography / Source Base
- Muzeum Narodowe w Szczecinie. National Museum in Szczecin, catalogue record for the painted wooden shield MNS/A/22250/1, dated c.1176–1200. Source link.
- Dowen et al. 2019. Keith Dowen, Lech Marek, Sławomir Słowiński, Anna Uciechowska-Gawron and Elżbieta Myśkow, Two Twelfth-Century Kite Shields from Szczecin, Poland, Arms & Armour 16, no. 2 (2019), 121–148, used here for the reported paint stratigraphy and preparation-layer interpretation. DOI: 10.1080/17416124.2019.1667049. Source link.
- Jagielska. Irena Jagielska, Badania i konserwacja drewnianej tarczy ze szczecińskiego Podzamcza, Materiały Zachodniopomorskie, new series VI/VII (2009/2010), 285–298, used here for the black organic layer and white preparation interpretation.
- Senn and Moser. Matthias Senn and Franz Moser, Der Reiterschild von Seedorf UR: ein Untersuchungs- und Restaurierungsbericht, Jahresbericht Schweizerisches Landesmuseum Zürich 100 (1991, published 1992), 80–85, the key technical source for the shield's parchment facing, layered azurite blue and silvered relief lion. DOI: 10.5169/seals-395364. Source link.
- Rahn. Johann Rudolf Rahn, 1878 examination / 1883 publication tradition for the Seedorf shield, used here for the source-qualified observation of front parchment with a gypsum-based, glue-bound preparation.
- Bildindex / Bildarchiv Foto Marburg. Institutional records for the Marburg shield group, including Schild des Landgrafen Konrad von Thüringen, Museum für Kunst und Kulturgeschichte der Philipps-Universität Marburg, inventory 3177, object record 0001336328, and related shields (Vögte von Keseberg, W. von Liederbach, Nordeck zu Rabenau, Welfenberg/Helfenberg, Stromberg, Steinau/Steinrück, the Counts of Arnsberg, Heinrich of Hesse, the Schenk von Schweinsberg shields, Karl von Trier and Muschenheim). Source link.
- Kohlmorgen. Jan Kohlmorgen, Der mittelalterliche Reiterschild: Historische Entwicklung von 975 bis 1350 und Anleitung zum Bau eines kampftauglichen Schildes (2002), used here as technical secondary literature for the Marburg group ground, gilding, silvering, patterned-ground and modelled-relief evidence.
- Warnecke. Friedrich Warnecke, Die mittelalterlichen heraldischen Kampfschilde in der St. Elisabeth-Kirche zu Marburg (Berlin, 1884), used here only as older source-chain evidence for Marburg technical descriptions, not as unchecked modern conservation proof.
- Nickel. Helmut Nickel, Der mittelalterliche Reiterschild des Abendlandes, FU Berlin dissertation 1958 / Der Herold offprint 1959/60, cited as broader historiography unless direct wording is available for a specific technical claim.
- Soler del Campo. Álvaro Soler del Campo, technical study of the Oña shields D 59 and D 60 in the Real Armería, Madrid, including the parchment, gypsum/stucco preparation, gilding and pigment-decoration evidence.
- Musées cantonaux du Valais. History Museum of Valais records and catalogue research for the Valère eagle shield, the Bartolomei/Sion shield and the Sion Cathedral Chapter shield, including the surviving decorative programmes and later re-covering evidence.
- Laking. Guy Francis Laking, A Record of European Armour and Arms Through Seven Centuries, vol. I (1920), used here for historical technical description of the Black Prince's funerary shield.
- Canterbury Cathedral / Royal Armouries. Canterbury historical and archaeological material and Royal Armouries research references for the Black Prince shield at Canterbury Cathedral, including the textile, gesso-like preparation, paper-like layer and leather composite surface.